Showing posts with label sewing. Show all posts

Wednesday, August 19, 2009

Kids' T-Shirts

Back to posting after a long time off. This summer I made (nearly) all the clothes for myself and my son. I haven't quite worked my way up to dressing my husband - Ralph seems to do a perfectly adequate job there - but I did make a mountain of t-shirts for my son.

I used the Ottobre "Best t-shirts" pattern and it worked perfectly. It does help to know a bit about sewing knits before you start with this pattern, as the explanations are fairly brief.


T-shirt in stripey Hilco Campan fabric

This fabric comes from Banberry Place, a fabulous resource for kids' (and particularly girls') European fabrics. This knit for Hilco in Germany is sturdy, stable, has body without being heavy-weight, and sews up perfectly. It's the nicest kids' knit or for that matter adult knit I've ever worked with. Well, at $24 a yard, it had better be. I'm not sure this project turned out to be a money-saver, but don't the little ones deserve the best?


Arthur models his t-shirt in "Carlo"
also from Banberry Place

Here are a few tips for making Ottobre t-shirts:

Determine the size Start by calculating the height of your little (or big) boy or girl in centimeters (2.54 centimeters = 1 inch). Use this measurement to determine the size shirt to make. My son is six and I made a size 116 cm.

Trace Now trace the pattern from the pattern sheet. If you prefer short sleeves, measure the sleeve from a shirt that fits your child, then add about 2.5 cm to the bottom edge for the hem. Add seam allowances to the pattern before you cut it out.

Cut your fabric Be careful to position the stripes to match front and back.

Assemble the t-shirt The pattern gives great assembly directions. I like the sewing instructions from Jalie t-shirts: if you don't have a serger, use 3-step zigzag or normal zigzag to sew the seams edges together first, then sew the seams at the seam line using a normal stitch, stretching slightly. Of course use a needle suitable for knits.

Hem Make the hem a bit deeper than what's called for to avoid having it flip up during wear, and interface the hem area with a strip of fusible knit interfacing.

Apply the binding I discovered a few tricks for applying binding. Have a look at the excellent video on the Threads website, which gives excellent instructions. Then cut your binding to the length specified in the pattern and sew the binding strip in a loop with a narrow hem.

You can reduce bulk by snipping the seam in the middle. Snip in between the zigzag almost to the seamline (see photos below). Now fold the binding in half lengthwise to apply it to the neckline, and placing half of the center seam to the left side and half to the right. Voila, you get a very flat, professional looking, non-bulky binding.

Now press carefully to flatten and gently stretch out any wrinkles around the neckline...although my son generally jumps into these t-shirts before I get a chance to press them. There's something magnetic about clothes your mom makes personally for you - you just love them more than other clothes.


Sew the binding to form a loop,
then snip the seam allowance at the mid-point of this seam.
Don't cut through the seam itself!


Push one side of the seam allowance to the left
and the other to the right


Sew the binding to the neck opening, stretching evenly to fit
(Check out the great tutorial on the Threads website)


Now you have a perfectly flat, non-bulky, professional binding
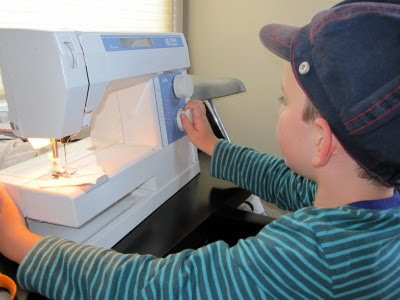

My son tries his hand at machine sewing
(under close supervision by mom)

A createur in the making? After this lesson I locked up the power cord, though.

Saturday, April 11, 2009

Marie Claire Idees

I subscribe to a wonderful French magazine called Marie Claire Idees. For those of you who don't know about this publication, it is the best crafts magazine anywhere in the world. You can subscribe here. (On the left side of the page, look for "Abonnement dom-tom / etranger" which means "foreign subscriptions." Click on the pull-down menu and opt for "Etats-Unis d'Amerique" which means "USA".)

This magazine is only available in French, but I'm thinking of offering a downloadable translation in English, so please let me know if you are interested. Here's a design that appeared in June 2008 (Issue No. 69) that I may make for this summer - instructions in English follow.


Mexican Inspiration - Flowered cotton skirt 
Rating: Very easy to make

Size 38/40 
(which is about a size 6/8, so you may want to adjust the measurements as required)

What you need

Cotton fabric, 54 or 60 inches wide:
1 yard of cotton fabric, printed with a small black and white floral design
1/2 yard of cotton fabric, printed with a black and white patchwork design
3 1/4" strip of black cotton fabric for the waistband
Interfacing for the waistband if desired


Black and white zigzag: 
You need 28 yards of zigzag in different widths. Each piece should be 2 3/4 yards long.

Black thread
White thread
65 cm of flat elastic, 2.5 cm wide

How to make the skirt

Preshrink and press all the fabrics and zigzag.

Cut out the fabric pieces

Cut 2 strips of printed black and white floral measuring 50" x 13" (125 x 33 cm)  
Cut 2 strips of printed black and white floral measuring 50" x 5"
Cut 4 strips of white fabric measuring 50" x 2"
Cut 2 strips of white fabric measuring 50" x 3 3/4"
Cut 2 strips of patchwork fabric measuring 50" x 3 1/2"

Sew the fabric pairs together

Sewing each pair together along the short edges, using a 3/8" seam allowance. 
Sew the two 13" pieces of floral fabric together, matching the short edges.  
Sew the two 5" pieces of floral fabric together, matching the short edges.
Sew two 2" pieces of white fabric to form one strip; sew the two other 2" pieces of white fabric together to form another strip.
Sew the two 3 3/4" pieces of white fabric together, matching the short edges.
Sew the two patchwork pieces together, matching the short edges.

Now cut and add the zigzag trim

Cut the zigzag into lengths, allowing a 3/8" seam allowance on each end. 
Sew 5 lengths of black zigzag onto the the 2" white bands.
Sew 3 rows of white zigzag onto each 5" band of floral fabric
Sew 6 rows of white zigzag onto the bottom of the 13" band of floral fabric

Sew the bands together

Stack the bands and sew together, allowing a 3/8" seam allowance. Start with the wide flowered band at the top, then:
Attach a 2" white band under the big flowered band
Attach the patchwork band
Attach a 2" white band
Attach the second floral band


Hem and finish

Fold the last white band in half lengthwise to add some weight to the hem. Sew the last (folded) white band onto the bottom of the skirt. 

Finish the seam allowances inside the skirt.

Sew 2 rows of black zigzag onto the white bottom band. 

Now assemble the skirt by sewing the vertical/back seam.  Work carefully to line up each strip.

Adding the waistband

Reduce the waist diameter to 90 cm by pining a lot of tiny pleats all around the upper edge of the skirt. 

Cut out a 36" strip of black fabric to form the waistband. Sew the short ends together with a 3/8" seam allowance to form a loop. Sew the waistband to the skirt right sides together. Turn the long unsewn edge of the waistband under 3/8". Now fold the waistband in half lengthwise and sew it to the inside of the skirt, leaving an opening to insert the elastic. Insert the elastic into this casing and sew it closed into a loop. Slipstitch the casing closed.

Tuesday, April 7, 2009

The Delicious dress: deliciously slow

Thank you to a dear reader for a great suggestion: Vogue V8578. This is quite glam and could be extended to maxi length. 

The one to try next:
Vogue 8578

In the meantime we chip away at the Hot Patterns Deco Vibe Delicious dress, which is so easy to make...unless you make it extra hard. The usual: a couple of seams, no zip, no buttons, all agony. So far, I have interlined all the pieces, pressed them nicely, and begun to assemble the dress. It isn't anywhere near ready to photograph but I include a photo anyway, so you can see the idea.


A pile of underlined pieces
Pinned together before sewing

Some initial learning: 

Work area: This is fairly self-evident but you need a big work surface to cut out the pieces for the maxi dress. 

Max-imize: I have the sense that the maxi dress works better aesthetically than the short dress. The long length gives somewhere for all that drape to go.

Basting: I basted all the underlining pieces to the fashion fabric pieces along the grainline. I've also basted the seams in place in areas where pieces were likely to slip. It's a bit of work but results seem good.

Pressing: The shoulder seams are curved. I pressed the seams flat after sewing, then pressed them open over a tailor's ham (with a bit of card underneath to prevent leaving a line), then pressed them on the right side, again over the tailor's ham and covered with silk organza. 

Sleeve gathering: I am now trying to figure out the ruched sleeves. The pattern suggests that you slit the sleeve opening, and then roll a narrow hem while inserting a bit of narrow elastic in the slit hem. I think this could work, but I am not sure I like this method. 

I took a break to walk around in downtown Manhattan Beach, and I passed a shop window where I saw with a beautiful spring dress, pale green with white flowers. When I looked closely I noticed that the white flowers were embroidered with beads. What a lovely idea. I might try adding a beaded detail to the hems of this dress if I need to weight it toward the hem. Do, and overdo, in other words.


Some segments now partly basted, partly pinned
(It's not as bad as it looks)

More to follow...

Saturday, March 28, 2009

In for a penny, in for a pound

Thank you, dear friends at PatternReview, for your advice on how to make myself look like this, except with more color:

The Dries van Noten dress of dreams 
(Oh come on Dries, a little peachy blush couldn't hurt)

I started making this dress exuberantly enough, tracing and then cutting out a muslin of the HotPatterns Deco Vibe Delicious Dress.  

"This dress isn't all that fitted," I said to myself, "I'll use my bust size." Wrong assumption, as it turned out. The muslin was a vast poof from the waist down. 

I've taken some advice from many people at PatternReview. Rather than add darts or try to shape the seams,  I traced the pattern in a smaller size from the waist down. 

I gave up on making another muslin, as the fabric was just too stiff. I rather bravely decided to skip making a second muslin and instead pin fit the Swedish tracing paper. The new size seemed to fit well enough, and was much sleeker.

Scissors in hand I launched into a long piece of deep blue silk. I was too terrified to cut into the Pucci fabric in my stash, but I needed to try this HotPatterns dress in very, extremely drapey fabric to discover whether this pattern would ever work. I was prepared to sacrifice this blue silk crepe de chine that I bought a few weeks ago on sale.


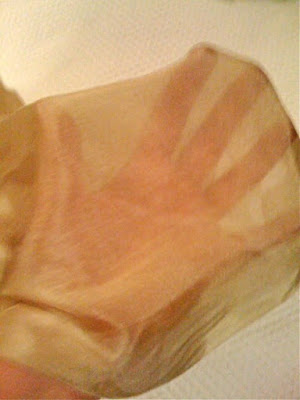
 I found that the blue silk was rawwther sheer
(My hand, visible through the silk)

I contemplated how to solve the sheerness problem. Wear a slip? Or underline? This dress is still an experiment, but it's getting more expensive by the minute. So far, I've bought a pattern for $18.95, plus shipping, and then $24 of silk and $5 of thread. I've made one muslin and traced this pattern twice using up practically an entire roll of $12 Swedish tracing paper. I've already spent $65 on a pattern I'm none too sure will work. 

But hey, why not go whole hog? I cut out the blue silk, which has great drape, although it was just too thin for a dress. I decided on interlining, thus my next step in crafting this utterly unproven HotPatterns design was to make another purchase: this time gossamer silk underlining, four yards at $12 a yard. I bought this silk at my local fabric shop, where the girl behind the counter had no idea what it was. 

"What kind of silk is this?" I asked. "Gold," she answered. We held up a length of the blue crepe de chine with this gold silk behind it. The two fabrics married as though draping a Grecian goddess.


Photos can't describe the delicacy of this gold silk,
whatever it is (habotai?)

This gold silk was so light that it was difficult to cut without pinning it to a surface. I didn't have a big enough piece of cardboard, and feeling impatient, I pinned it to my Persian carpet. Not at all the recommended method, but it worked a trick.


Silk pinned to the carpet


Underlining sewn in place, before pressing

The underlined silk panels have the most astonishing lava-like drape. Hopefully drapiness will be the trick that transforms the Delicious Dress experiment from maternity dress to goddess-wear. I'll let you know in a few days. I've got yards more basting to do.

In the meantime I'm still contemplating the Pucci fabric in my stash. I've ordered two patterns from Marfy. Maybe this fabric wants to be a tunic? Or an asymmetrical dress? 


The butterfly is missing a wing
Does it work? I think I love it.


A great square pleated neckline

Sometimes there are just too, too many options out there.


Friday, March 13, 2009

DecoVibe Delisch Dress - waist not want not

What I had in my mind:
Dries Van Noten, Fall 2007 collection

Dear seamstresses and fashionistas out there: I have been imaging myself at a swinging 1970s party, glass of wine in hand, stylin' in my drapey maxi dress. 

Things have not worked out as expected. I made a muslin for the Deco Vibe Delicious Dress. I really do not want to admit this, but I'm feeling seriously disappointed.
 
Muslin of the Deco Vibe Delicious Dress

Muslin fabric cannot, and should not be allowed to tell the story of this dress. But it's clear the muslin I made from the pattern does not look like the illustration on the pattern envelope. There is one important reason why: no waist.

The pattern envelope describes shaped center front and back seams. If you look at the illustration, the dress appears to have a shaped side seams as well:


The illustration shows waist shaping


Here's the side seam of the muslin
Slightly, but almost imperceptibly shaped 
(I was too despondent to iron it)

Something else about the Dries Van Noten dress: the gathers start at the very bottom of the V, at the lowest point of the neckline. These gathers all emanate from one point and open horizontally and vertically. The design ends up fitting something like an empire dress - at least that's how I read the photo. It's not the same shape as the HotPatterns dress.

I'll attempt to reshape the muslin by:
1. Curving the side seams
2. Adding darts to the back
3. Adding a seam for the center back of the neck binding
4. Adding a zipper down the back

If any of this works I'll let you know. Otherwise I'm trying something else: Simplicity 2754.


Monday, March 9, 2009

HotPatterns Deco Vibe Delicious Dress: Planning


Have you ever been faced with a fabric so beautiful that it paralyzes you with indecision? 

I am dreaming of an evening gown made in this astonishing Emilio Pucci fabric. Or is it a caftan? Or a daytime dress? Not sure, but I do think it can work a a maxi dress worn ankle length, with elegant flat sandals. With this giant print, you need to show your ankles to break things up a bit.

Emilio Pucci silk print

Possibly with these strappy sandals
Alexander McQueen at Net-a-Porter for (cough) $685

Something perfect would be to add bands with a small-scale toning print, but sadly I didn't find one. See what I mean with the effect on this Pucci Alessandro dress. It could totally work to create a dress with just the top part made in the big pattern, like this Missoni kimono dress. 

I could also use black banding on the sleeves and black edging around the neckline to break up the print. 

But please write in your comments. Is this print just too much of a good thing? The muslin is cut out - with the dress below in mind - I'll post it later this week.


The dress in question
(First on the right)
A maxi in every way, from HotPatterns


Saturday, February 28, 2009

Inspiration

I've been sewing a camisole in Liberty fabric - another piece for the $15 wardrobe. Unfortunately I tripped over the foot control for my sewing machine and broke it (the control, not my foot) just as I was finishing this camisole. A sign, my husband says, that I may need a dedicated sewing room.

But this accident gives me an opportunity to show you what's inspiring me now, while I wait for a new foot control to arrive in the mail.

London Fashion Week is always a great source of ideas. You can see details of the shows on the Guardian (UK newspaper) website. Christopher Kane is a 26-year old British designer who attracted a lot of attention at fashion week with strong, elegant looks for Fall 2009. Here are two dresses he created based on black marker scribbles on white paper.


Black on net (or chiffon?)
simultaneously strong and delicate


Vertical lines ending in a froth of ruffles:
thrilling sense of movement


These skirts would be challenging to sew, but they show what can be done even without color, using binding to define shapes and create rhythm and movement. 

Sadly, as much as I admire these looks they don't fit into my current life as parent to a kindergartener. I don't get as many opportunities as I'd like to wear chiffon. But here are some appealing designs from Missoni that are flexible enough to wear in many ways. They could be made from genuine Missoni fabric (try Emma One Sock) or from a similar knit.

Very wearable Missoni kimono top


A basic wrap dress 
interesting play of fabric on the neckline and belt

I'm making a top from Onion 5015, which doesn't have the same drapey sleeves but does have a similar shape. There's also a tutorial for a top like this on the Sewing Divas website. 

I'm thinking about sewing more tee shirts, too. Sonia Rykiel also offers some sophisticated and playful options.


A long stripey t-shirt or sweater
with hot pink details


Another stripey top
This with multi-color details

I'm starting these tee shirts with with a striped knit from Lucy's Fabrics. I found colored rib knits from a children's fabric supplier. I lengthened a Jalie pattern to get this longer, sleeker look. I'll show some photos of this project in a follow-up post. 

And here is a style from Alexis Mabille. I'm a bit afraid to work with lace, but this is a terrific blouse with a polo-style collar in satin. This blouse would suit women of all ages and it could be worn across seasons. The collar updates the look, but it's a classic that wouldn't go out of style: a smart use of expensive lace fabric. 


Alexis Mabille lace blouse from 2008

It seems as though everyone's making their designer looks at home. If you're up for a challenge, Paul Smith offers a pattern and instructions for how to turn an old shirt into a Paul Smith shirt - find it on the Guardian (UK newspaper) website.


Thursday, February 26, 2009

$15 remakes your wardrobe: Liberty bathrobe

Adding Liberty trim to a terry bathrobe is one of the easiest and fastest projects imaginable and the results are extraordinary, showing that a very small amount of Liberty of London fabric can add a lot of personality to your look. The idea for this project comes from Simple Sewing with a French Twist (also described in a previous post). Ms. Dupuy once again uses British fabric to create what she calls a French look, but never mind the provenance, we love it.


Terry bathrobe detailed with a Liberty print

This project requires just under half a yard of Liberty Tana Lawn. I bought this Liberty print for 50% off when I was in London, so my cost for this bathrobe trim came to under $10. I'm cheating a bit by not including the cost of the bathrobe itself. I bought this one on sale at Land's End for about $35, so overall this is an inexpensive project. And something else that's great: it only takes an hour to complete.

You will need a white or cream terry bathrobe and around half a yard of Liberty Tana Lawn. You can find this at PurlSoho, where they have an beautiful collection, or order fabrics direct from Liberty of London.

Ms. Dupuy gives detailed instructions for this project in her book. This book is great addition to your library - it includes patterns and complete instructions for fifty highly creative and surprisingly easy-to-make projects - and this book is on sale at Amazon for 35% off and it's now $18.15. 


The first step in this project is to preshrink both the bathrobe and the fabric. Make sure to use the same washing method for both. I washed both on warm and dried in the dryer to shrink. I generally wash Liberty fabrics in cold water on the gentle cycle and hang to dry away from direct sunlight - these fabrics are delicate and prone to fading over time. Press the Liberty fabric.

Now you are ready to measure the belt and the cuffs:


Measure the width and length of the belt


Measure the depth of the bathrobe cuff


Measure the circumference of the cuff

Once you have your measurements, add 15 mm or 5/8" seam allowances all around and cut out your fabric.  When you cut out the cuff, you can choose how far you'd like the Liberty fabric to wrap around to the inside of the cuff. You can wrap just one inch or all the way up to the top of the bathrobe cuff, about four inches. This depends on how much fabric you have, and whether you'd like to be able to roll up the cuffs when wearing the bathrobe. 

Once your pieces are cut out, press under the seam allowance at the ends of the belt.


Pressing the belt ends under

Do the same for the cuffs on the top and bottom edges.

Fold the belt fabric in half lengthwise and sew the long edges, leaving the short ends open. Sew the cuff fabric side seams together as well. Press flat to set the stitches, then press open and trim.

Next, slide the terry cloth belt through the Liberty fabric cover. Use a safety pin to guide the terry belt through the fabric. This is a bit fiddly because of the difference in fabric weights. Be careful not to rip the Liberty fabric as you work. Just slide the terry through gently, pulling the a bit of the Liberty fabric along at a time. Don't rush here.

Center the cover seam down the middle of the belt. Now you can topstitch through the center of the belt. I used a slightly longer stitch length, 3.0.

Topstitch down the center of the belt

Now topstitch across the ends of the belt. Press thoroughly (and I needed to steam it to get it flat). Belt finished!

To sew on the cuffs, align one turned-under edge of the Liberty fabric with the top of the bathrobe cuff. There is a line on the bathrobe that you can use as a guide - it's fairly easy to spot. Pin and sew in the Liberty fabric in place, again using a slightly longer than normal stitch length.


Slide the sleeve over your machine arm; 
stitch cuff in place

Now hand slip-stitch the inside of the cuff in place, and enjoy! In another post, I'll explain how to make a darling camisole to match this bathrobe. 


Tuesday, February 24, 2009

$15 remakes your wardrobe: hip-tie blouse

Every girl can use a versatile silk top. One excellent choice is the Betsy Ross Pattern's Hip-Tie Blouse. This blouse rocks worn with skinny pants and ballet flats. It's equally darling with wide linen slacks and sandals or with a straight skirt and heels. You can take it uptown by wearing it under a suit. The neckline is high, so this top looks groovy and hip, silky but not overtly sexual: it's the perfect date-night or casual dinner party top.


Betsy Ross Hip-Tie Blouse in a blue animal print

If you've never sewn with silk, this blouse is a good place to begin, because construction is simple - there are no zips, no buttonholes and no facings, not even interfacing. Be brave and try couture fabric, or go cheapie by using just about any silky synthetic, jersey, cotton, or knit that takes your fancy. It helps if you choose something lightweight and/or with a bit of drape.


Super-sweet bow at the hip

And the Hip-Tie Blouse in silk qualifies for the $15 wardrobe. You can buy silk crepe de chine on sale now right now at Denver Fabrics for $6 per yard (reduced from $22 per yard - quite a deal). 

Here are a few tips to get you started:

Play with fabrics: Be brave and try expensive printed couture silk charmeuse - you're not going to end up hospitalized with buttonhole-related anxiety: no buttonholes. You can also choose crepe-back satin: use the crepe side for the body and the satin side for the bindings and waist sash. Another option is georgette for the body (double or interline it), combined with matching silk satin for the sash and bindings. Try black, bordeaux or cream to create a designer look-a-like. 

Choose the best size: My experience is that Betsy Ross Patterns, cute as they are, have a funny range of sizes. These patterns are always too big for me, even following the sizing chart. I recommend that you measure yourself accurately to start, plus take that extra minute to measure a blouse or top that fits you well. Compare these two measurements to the pattern. 

Check the depth of the arm opening:  You can easily adjust the depth of the armhole. Trace the pattern onto Swedish tracing paper or similar, raising the armhole depth if needed. You'll want enough depth for comfort and ease - but not so much that everyone can see the side of your bra under your arm.   

Check the bust size ranges: This pattern is sized from XS to XXL. The range of bust measurement varies from one inch for XS to a whopping five inches for XL. Possibly, preferably make a muslin before you cut into that $110 a yard Roberto Cavalli fabric, because you may need to draft an in-between size for yourself by redrawing the cutting lines to create a width equal to your bust measurement plus an inch/inch and a half of ease. You want a soft, drapey fit. You don't want to find yourself sailing in a parachute's worth of silk. Unfortunately this sizing problem can annoyingly take the Hip-Tie Blouse from a rating of ultra-easy to the more complicated, why-don't-you-just-draft-your-own-pattern level of competence. 

Here is the mistake I made: I have a 40" bust but I didn't want something too tight, so I elected to make the XL.  Oops. Looking over that size range with a critical eye might have saved me some trouble, as I ended up with a blouse that is 6" too wide all over. The armholes are also too deep for me: the top doesn't cover my bra at the sides, and - although it doesn't much matter given the other problems - the body is also too long.  Sometimes with independent pattern companies, it pays to analyze the size chart, not just read it.


Bust measurement across the front, 
before I took it in

Handle silk with care: If you're using silks or slippery fabrics, follow the cutting-out instructions and sewing tips in my previous post on the Decades of Style Butterfly Blouse.

Add a little handstitching: This pattern calls for topstitching the bias tape in place at the neck and arm openings. Hmmm. I wouldn't do that. It's worth slip-stitching by hand to get an immaculate result.

Top with a sweet button: The pattern also calls for a hook-and-eye closure at the neckline. Betsy warns you not to attach the hook by machine, "or you'll put out your eye." This describes some awfully rough-and-ready sewing. We can probably do better. I think this top looks its most appealing with a tiny, refined button at the back of the neck. Make a loop of self-fabric or a thread loop to hold it. Look for a lovely button in your stash or buy just one that is special.


 Shell button makes a lovely detail

Just follow the instructions (once you've dealt with the size): Betsy Ross talks to us in a quirky, girlfriend-to-girlfriend way, but it's all perfectly understandable. Once you've got the size figured out, this top assembles in a snap. If you're an advanced beginner (or above), use your skills to construct something just that bit more refined that will add value to your wardrobe for a long time: it's worth it. 


Sunday, February 15, 2009

Make a Liberty tie

Thank you very much for writing in with your favorite fabric resources, and thanks also for the comments on tie patterns. 

David Page Coffin now has a pdf available of his instructions for making ties, available for $8.00 from his blog page. This is a great investment - you definitely want to get this if you have any interest in making ties. One-half yard makes two ties, so you can make Liberty ties in silk or cotton for about $12 each (plus, alas, shipping).

I haven't read all of the tie-making guide yet, but it includes crystal clear, hand-drawn illustrations and guidance for selecting the most suitable fabrics. The guide also offers links for websites that offer silk fabric for ties. 


Tuesday, February 10, 2009

$15 remakes your wardrobe: knit t-shirts

It's taking me years of sewing, but I finally discovered knits. I work from home, I'm a mom, I live in Southern California, the result being that I live in tee-shirts. At long last I learned that they are fast and inexpensive to sew. You can make tees without a serger - I learned how, as I'm too much of a penny-pincer to buy what would probably be an indispensable machine.

Add a tee shirt in French fabric to your wardrobe:
Time: 45 minutes 
Cost: $12.58

You have to add the cost of the pattern, and the thread, and possibly the needle - but then you probably have a tee-shirt pattern in your stash.


Fresh aqua print from Lucy's fabrics


Sophisticated Anne Klein paisley from Textile Studio


French red wool, flecked with steely blue
again Textile Studio

The wool or Anne Klein fabric will set you back slightly more than $15, to be honest.

I began sewing knits with one perfectly-crafted pattern: the Santa Monica Tee from Textile Studio.  

I've found several great sources for fabric, and there are so many more, so please tell us your favorites in the Comments below.

Lucy's Fabrics has hip knits 

Textile Studios has upscale, carefully-selected knits 

Banberry Place has fabulously colorful Euro knits 

Here are a few from Lucy's now in my stash:


An adorable floral from France:
subtle teal, browns and mustard 


Zippy Pucci look-a-like, also from France:
the print goes in the bodice; 
sleeves and binding are black.

So many of you out there are expert at sewing knits, and far ahead of me. But here for beginners are my quick tips:

- Don't be afraid of knits.

- Get the right needle for your machine.

- Test different stitches before you start. Use a 3.0 stitch length for sewing seams, and stretch the fabric in front and behind the needle as you sew. You can also use a very narrow zig-zag for seams. Test on a scrap of your fabric to see what amount of stretch gives you the best results. You want to be able to stretch your garment a bit during wear without breaking the thread.

- If you don't have a serger, finish the edges with zig-zag or 3-step zig-zag. It's probably on your machine and you may never have used it. It looks so great on edges!

- Use of bit of lightweight knit interfacing in the hem so the edges don't curl while you're sewing the hem.

- Sew a strip of stable fabric into the shoulder seams to stabilize them.

- There are great instructions for binding necklines on this Threads video.

Detail of 3-step zig-zag finishing

Leftovers: You often end up with lots of leftover fabric when you make tee-shirts. Use it to make:

- Sleeves or bodices for another project
- Binding for another project
- Kids' tee-shirts
- Hairbands
- Camisoles and undies

I am going to try my hand at making boy shorts and some more tees from Jalie. Undies call for 4-way stretch but I might be able to get away with my bits of leftover rayon-lycra fabric, with more stretch in the width than in the length. 

I'll let you know in a future post how this works out - will I be able to get into this underwear? At least I've got cute tops to wear.