Back to posting after a long time off. This summer I made (nearly) all the clothes for myself and my son. I haven't quite worked my way up to dressing my husband - Ralph seems to do a perfectly adequate job there - but I did make a mountain of t-shirts for my son.
I used the Ottobre "Best t-shirts" pattern and it worked perfectly. It does help to know a bit about sewing knits before you start with this pattern, as the explanations are fairly brief.

T-shirt in stripey Hilco Campan fabric
This fabric comes from Banberry Place, a fabulous resource for kids' (and particularly girls') European fabrics. This knit for Hilco in Germany is sturdy, stable, has body without being heavy-weight, and sews up perfectly. It's the nicest kids' knit or for that matter adult knit I've ever worked with. Well, at $24 a yard, it had better be. I'm not sure this project turned out to be a money-saver, but don't the little ones deserve the best?

Arthur models his t-shirt in "Carlo"
also from Banberry Place
Here are a few tips for making Ottobre t-shirts:
Determine the size Start by calculating the height of your little (or big) boy or girl in centimeters (2.54 centimeters = 1 inch). Use this measurement to determine the size shirt to make. My son is six and I made a size 116 cm.
Trace Now trace the pattern from the pattern sheet. If you prefer short sleeves, measure the sleeve from a shirt that fits your child, then add about 2.5 cm to the bottom edge for the hem. Add seam allowances to the pattern before you cut it out.
Cut your fabric Be careful to position the stripes to match front and back.
Assemble the t-shirt The pattern gives great assembly directions. I like the sewing instructions from Jalie t-shirts: if you don't have a serger, use 3-step zigzag or normal zigzag to sew the seams edges together first, then sew the seams at the seam line using a normal stitch, stretching slightly. Of course use a needle suitable for knits.
Hem Make the hem a bit deeper than what's called for to avoid having it flip up during wear, and interface the hem area with a strip of fusible knit interfacing.
Apply the binding I discovered a few tricks for applying binding. Have a look at the excellent video on the Threads website, which gives excellent instructions. Then cut your binding to the length specified in the pattern and sew the binding strip in a loop with a narrow hem.
You can reduce bulk by snipping the seam in the middle. Snip in between the zigzag almost to the seamline (see photos below). Now fold the binding in half lengthwise to apply it to the neckline, and placing half of the center seam to the left side and half to the right. Voila, you get a very flat, professional looking, non-bulky binding.
Now press carefully to flatten and gently stretch out any wrinkles around the neckline...although my son generally jumps into these t-shirts before I get a chance to press them. There's something magnetic about clothes your mom makes personally for you - you just love them more than other clothes.


Sew the binding to form a loop,
then snip the seam allowance at the mid-point of this seam.
Don't cut through the seam itself!

Push one side of the seam allowance to the left
and the other to the right

Sew the binding to the neck opening, stretching evenly to fit
(Check out the great tutorial on the Threads website)

Now you have a perfectly flat, non-bulky, professional binding
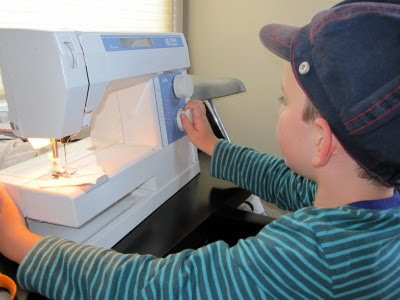
My son tries his hand at machine sewing
(under close supervision by mom)
A createur in the making? After this lesson I locked up the power cord, though.


2 comments:
Great tute. I've been sewing t-shirts since my teenagers were babies, but I've just picked up the idea of splitting the seam allowance on neck and sleeve bands from you. Thanks!
Cute shirts, cute kid! Thank you for the t-shirt tutorial. I am usually rather slapdash about technique, but have resolved to make better t-shirts for the kids! I also loooove Campan jersey; even here in Germany it usually costs around 18 Euros, but it's absolutely worth it!
Post a Comment